Author name: Techie

Software

How Does Zoom Make Money?

Virtual communication has become a cornerstone of daily life, and few platforms have revolutionized this space like Zoom. Originally a niche software for corporate meetings, Zoom has exploded in popularity. The tool has become a household name across various sectors, including education, healthcare, and social interactions. But as the user base swells, a question emerges: how does Zoom make money and grow its business?  This article delves into the revenue model of Zoom, exploring the diverse strategies that have turned it into a billion-dollar enterprise. From subscription plans to innovative add-ons and strategic partnerships, we uncover the mechanisms behind Zoom’s financial success and its ongoing evolution in a competitive market. How Does Zoom Make Money? Zoom’s revenue generation strategy is multifaceted, leveraging various streams to ensure a robust and sustainable business model. Here are the key ways Zoom makes money. Subscription plans.  Zoom rooms and hardware.  Addon features.  Zoom events and onzoom  Enterprise solutions and API integrations.  Partnerships and sponsorships  Advertising.  Let’s take a look at each revenue model of zoom individually.   1. Subscription Plans Zoom offers a tiered subscription model that caters to different user needs, from individuals and small businesses to large enterprises. These plans include: Basic (Free): While the basic plan is free, it is limited in features, such as a 40-minute cap on group meetings. This limitation encourages users to upgrade to paid plans for more comprehensive use. Pro: Aimed at small teams, the Pro plan includes extended meeting durations (up to 30 hours), cloud recording, and administrative controls for $14.99 per month per license. Business: For small and medium-sized businesses, this plan offers additional features such as company branding, dedicated phone support, and administrative dashboards for $19.99 per month per license. Enterprise: Designed for large corporations, the Enterprise plan includes unlimited cloud storage, dedicated customer success managers, and executive business reviews, also priced at $19.99 per month per license but often negotiated based on the organization’s needs. 2. Zoom Rooms and Hardware Zoom Rooms are physical setups that integrate hardware and software to create an optimized meeting environment. Companies can purchase Zoom Room licenses, which include access to specialized software, along with hardware solutions like cameras, speakers, and monitors. These setups enhance the meeting experience and are particularly popular in corporate boardrooms and conference centers. 3. Add-On Features Zoom offers a variety of add-ons that enhance its basic services, allowing users to customize their experience according to their specific needs. Some of these add-ons include: Zoom Phone: A cloud phone system for businesses that integrates with the Zoom app, providing seamless communication through voice calls. Webinars: Zoom’s webinar service allows for larger-scale virtual events, supporting thousands of participants with features like attendee registration, reporting, and Q&A functionality. Large Meetings: For an additional fee, users can increase the participant limit for meetings, accommodating up to 1,000 participants. 4. Zoom Events and OnZoom Zoom Events is an all-in-one platform for hosting virtual events, such as conferences, summits, and trade shows. OnZoom, a sub-platform, allows users to create, host, and monetize their own virtual events, such as fitness classes, concerts, and workshops. These platforms not only provide tools for event management but also offer ticketing and registration services, generating revenue through transaction fees. 5. Enterprise Solutions and API Integrations Zoom provides customized solutions for large enterprises, often involving bulk licensing agreements and tailored services. Additionally, Zoom’s API integrations allow businesses to embed Zoom’s functionality into their own applications, fostering deeper integration and dependence on Zoom’s services. These integrations often come with associated fees, adding another layer to Zoom’s revenue stream. 6. Partnerships and Sponsorships Zoom has formed strategic partnerships with various technology and service providers to enhance its offerings. These partnerships can involve revenue-sharing agreements, co-marketing initiatives, and bundled service packages. By collaborating with other industry leaders, Zoom expands its market reach and diversifies its revenue sources. 7. Advertising Although not a primary revenue source, Zoom has experimented with in-meeting advertising for free users. This approach provides an additional income stream while keeping the core service accessible to a broad audience. How Much Zoom Earns in a Fiscal Year?  As of the fiscal year ending January 31, 2023, Zoom Video Communications, Inc. reported revenue of approximately $4.39 billion. This marked a significant increase from previous years, reflecting the continued strong demand for remote communication solutions driven by the ongoing impact of the COVID-19 pandemic and the broader shift towards hybrid and remote work environments. Zoom’s financial performance has been characterized by substantial growth since the pandemic began, with the company continuously expanding its user base and enhancing its product offerings to cater to a wide range of customer needs. The revenue growth highlights the effectiveness of Zoom’s diversified revenue streams, including its subscription-based model, enterprise solutions, and add-on features. It’s important to note that financial figures can fluctuate based on various factors, including market conditions, competition, and changes in user demand. For the most current and detailed financial information, reviewing Zoom’s latest financial statements and quarterly reports is recommended. Conclusion Zoom’s success is built on a diverse and adaptable revenue model that leverages subscription services, hardware solutions, premium add-ons, event hosting platforms, enterprise integrations, strategic partnerships, and advertising. This multifaceted approach not only ensures steady income but also positions Zoom to continually innovate and expand in a competitive digital communication landscape. By understanding how Zoom makes money, we gain insight into the strategies that drive its growth and the value it provides to millions of users worldwide.

How to Easily Record Voicemail Greeting on iPhone - A Beginner's Guide
Phones

How to Easily Record Voicemail Greeting on iPhone

Having a personalized voicemail greeting on your iPhone is essential for leaving a positive impression, whether you’re managing business calls or personal connections. A customized greeting not only sounds more professional but also allows you to convey important information to callers when you’re unavailable. Despite its importance, many people find the process of setting up a voicemail greeting on their iPhones confusing or intimidating. In this Phone guide, we’ll walk you through the step-by-step process of recording your voicemail greeting on an iPhone. We’ll cover everything from accessing the voicemail settings to recording a clear and effective message. Whether you’re looking to set up a friendly personal greeting or a formal business message, this article will provide all the necessary tips and instructions to get you started. Steps to Record Voicemail Greetings on iPhone Recording a voicemail greeting on your iPhone is a straightforward process. By following a few simple steps, you can create a personalized message that greets your callers when you’re unavailable. Here’s how you can access the settings, record your greeting, and ensure it sounds just right. Open the Phone app and go to the Voicemail tab. Tap “Greeting” and choose “Custom” to record your message. Tap “Record” to start recording. Speak clearly and tap “Stop” when finished. Listen to your recording, then tap “Save” to set it as your voicemail greeting. Tips for a Good Voicemail Greeting Keep your greeting short and to the point. Mention your name and any important details. It might sound strange, but smiling can make your voice sound friendlier. Ensure your voice is clear and easy to understand. Additional Tips and Features Beyond the basics of recording and setting up your voicemail greeting, some additional tips and features can enhance your voicemail experience on your iPhone. These can help you manage your messages more efficiently and make the most out of your voicemail system. 1. Using Visual Voicemail Visual Voicemail is a convenient feature on the iPhone that allows you to see a list of your voicemail messages and choose which ones to listen to, save, or delete. Here’s how to use it effectively: Viewing Messages: Open the Phone app and go to the Voicemail tab. You’ll see a list of your voicemail messages, with the caller’s information and the date/time of the call. Listening to Messages: Tap on a message to play it. You can pause, rewind, or fast-forward through the message using the on-screen controls. Deleting Messages: Swipe left on a message and tap Delete to remove it. This can help you keep your voicemail inbox organized. Saving Messages: If you want to keep a message for future reference, you can save it. Tap on the share icon and choose how you want to save or share the message, such as sending it to your email. 2. Managing Voicemail Settings Customizing your voicemail settings can help you tailor your voicemail experience to your needs. Here are some options you can adjust: Change Voicemail Password: For added security, you can change your voicemail password. Go to Settings > Phone > Change Voicemail Password and follow the prompts. Turn on Voicemail Transcription: This feature converts your voicemail messages into text, making it easier to read them. If it’s available with your carrier, you’ll see the transcription automatically when you view a voicemail message. Adjust Voicemail Notifications: Make sure you don’t miss any messages by adjusting your voicemail notification settings. Go to Settings > Notifications > Phone and customize how you receive alerts for new voicemails. 3. Using Third-Party Voicemail Apps There are third-party apps available that offer additional voicemail features, such as enhanced transcription services, visual voicemail for unsupported carriers, and more advanced message management. Some popular options include: YouMail: Provides visual voicemail, spam call blocking, and personalized greetings for different callers. Google Voice: Offers voicemail services with advanced transcription and the ability to access your messages from multiple devices. 4. Voicemail Etiquette and Best Practices Good voicemail etiquette ensures that your messages are clear and professional. Here are some best practices: Be Concise: Keep your messages brief and to the point. Long messages can be cumbersome for the recipient. State Your Name and Purpose: Mention your name and the reason for your call. This helps the recipient understand the context of your message. Leave Contact Information: Make sure to leave your phone number or other contact details, especially if you’re calling from a number the recipient may not recognize. Speak Clearly: Speak slowly and clearly to ensure your message is easy to understand. Avoid background noise when possible. Customizing Voicemail Greeting for Different Scenarios Your voicemail greeting can be tailored to fit different situations. Whether you need a friendly message for personal calls or a professional greeting for work, customizing your voicemail can help you communicate more effectively. Here are some tips for creating voicemail greetings for various scenarios. 1. Personal Greeting A personal voicemail greeting is great for friends and family. It should be friendly and approachable. Tips for a personal greeting: Keep it casual and warm. Use your first name. Feel free to add a bit of your personality. 2. Professional Greeting A professional voicemail greeting is important for work-related calls. It should be clear, concise, and convey a professional tone. Tips for a professional greeting: Use your full name and company name. Ask for the caller’s information. Keep the tone professional and polite. 3. Out-of-Office Greeting If you’re going to be away for an extended period, an out-of-office greeting can inform callers of your absence and provide alternative contact information if necessary. Tips for an out-of-office greeting: State the dates of your absence. Provide an alternative contact if needed. Thank the caller for their understanding. 4. Seasonal Greeting A seasonal greeting can add a festive touch during holidays or special occasions. Tips for a seasonal greeting: Mention the specific holiday or occasion. Keep it cheerful and festive. Include your return date if applicable. By customizing your voicemail greeting for different scenarios, you can ensure that your

How to Blur Backgrounds in Zoom Like a Pro
Software

How to Blur Background in Zoom Like a Pro

In today’s digital age, video calls have become essential to how we communicate, whether for work, school, or staying connected with loved ones. However, the quality of these video calls can significantly impact how we are perceived and how effectively we can communicate our message. One key aspect of enhancing video call quality is improving the visual environment, and Zoom’s background blur feature offers a simple yet powerful way to achieve this. When you blur your background in Software like Zoom, you can instantly remove distractions and create a cleaner, more professional appearance. This feature is especially useful for maintaining privacy, reducing visual clutter, and focusing on yourself during meetings or virtual presentations. In this article, we’ll delve into everything you need to know about how to blur your background in Zoom effectively. Whether you’re new to using Zoom or looking to optimize your video call setup, mastering background blur can elevate your video conferencing experience to the next level. Let’s explore how you can achieve a polished and professional look in Zoom meetings with just a few simple adjustments. Step-by-Step Guide to Blur Background in Zoom Blurring your background in Zoom is a straightforward process that can greatly enhance the quality and professionalism of your video calls. Whether you’re in a busy home environment, or a public space, or simply want to maintain privacy, enabling background blur can help you present a clean and focused image. Here’s how to do it: 1. Open Zoom on your desktop or mobile device. 2. In a meeting or the main interface, click the “Settings” (gear icon) at the top right. 3. Go to “Backgrounds & Filters” under settings.   4. Click “Choose Virtual Background.” 5. Check the “Blur” option in the virtual background settings. 6. Use the slider to adjust blur intensity to your preference. 7. Use the “Preview” feature to see how it looks. 8. Adjust lighting or background as needed for best results. Following these steps will help you effectively blur your background in Zoom, enhancing the professional appearance of your video calls. Advanced Tips for Optimal Background Blur Once you’ve mastered the basics of blurring your background in Zoom, consider these advanced tips to further enhance your video call experience: 1. Utilize Virtual Backgrounds Wisely Experiment with Zoom’s virtual backgrounds in combination with background blur to create a polished look. Choose backgrounds that complement your appearance and the tone of your meeting. 2. Optimize Lighting Conditions Good lighting conditions are crucial for achieving the best background blur effect. Position yourself facing natural or soft artificial light to ensure even illumination and reduce shadows that could interfere with the blur effect. 3. Adjust Camera Placement Place your camera at eye level and ensure it captures your face evenly. This setup not only improves video quality but also helps Zoom’s background blur feature work more effectively by providing a clear image for the software to analyze. 4. Consider Your Attire and Colors Wear solid-colored clothing that contrasts with your background to help Zoom differentiate between you and your surroundings. This contrast can improve the accuracy of the background blur effect. 5. Test Different Settings Explore Zoom’s settings to fine-tune background blur according to different meeting environments. Adjust the blur intensity and test how it appears in various lighting conditions and with different backgrounds to find the optimal settings for each situation. Enhancing Video Call Etiquette with Background Blur Using background blur in Zoom goes beyond aesthetics; it also plays a role in enhancing video call etiquette and professionalism. Here’s how: 1. Maintaining Privacy Background blur helps maintain privacy by concealing details of your surroundings during video calls. Whether you’re working from home or in a public space, background blur ensures that personal or sensitive information remains hidden. 2. Reducing Distractions A cluttered or messy background can be distracting to meeting participants. By blurring the background, you create a clean and focused visual environment that directs attention to you and your message, enhancing communication effectiveness. 3. Fostering Professionalism Presenting yourself with a blurred background adds a professional touch to your video calls. It demonstrates attention to detail and a commitment to maintaining a professional appearance, which can positively influence how you are perceived by colleagues, clients, or collaborators. 4. Creating a Consistent Image Using background blur consistently across meetings helps establish a cohesive and polished image. It ensures that each video call presents you in the best possible light, regardless of your physical location or surroundings. 5. Encouraging Engagement A distraction-free background encourages engagement and participation in meetings. By eliminating visual clutter, you create a conducive environment for focused discussions and effective collaboration. Troubleshooting Common Issues When trying to blur your background in Zoom, you might encounter a few common issues. Here are some troubleshooting steps to help resolve them: Blur Background Option Not Available Ensure you have the latest version of Zoom installed. Updates often introduce new features. Check if your Zoom account meets the minimum system requirements for background blur. Verify that your computer’s hardware supports background blur. Older devices may not support this feature. Blur Not Working Properly Make sure your internet connection is stable. Poor connection can affect video quality, including background blur. Check your Zoom settings to ensure the blur background option is enabled. Close any other applications that may be using significant resources, as this can impact Zoom’s performance. Blur Looks Unnatural or Distorted Ensure your background is appropriate for blurring. Uniform backgrounds without complex patterns or moving objects work best. Adjust your lighting. Harsh or uneven lighting can affect how well Zoom can blur the background. Experiment with the blur intensity settings in Zoom. Sometimes, a slight adjustment can improve the quality of the blur. Zoom Crashes or Freezes When Using Blur Update your graphics drivers to the latest version. Outdated drivers can cause stability issues. Lower your camera resolution in Zoom settings. This reduces the workload on your computer’s resources. Restart your computer and ensure no other applications are running in the background

Is Adobe Creative Cloud Worth It? A Comprehensive Guide
Software

Is Adobe Creative Cloud Worth It? A Comprehensive Guide

In today’s digital age, creatives and professionals alike are constantly seeking Software that streamlines their workflow and enhances their creative output. One such powerhouse in the realm of digital design and multimedia is Adobe Creative Cloud (Adobe CC). Designed to cater to a wide spectrum of creative needs—from graphic design and video editing to web development and photography—Adobe CC offers a comprehensive suite of applications and services accessible via a monthly or annual subscription. The question often arises: is Adobe Creative Cloud worth it? This article delves into the various aspects of Adobe CC to help you make an informed decision. We’ll explore its features, benefits, and costs, to evaluate whether subscribing to Adobe Creative Cloud aligns with your creative ambitions and practical requirements. Whether you’re a seasoned professional or just starting, understanding the value of Adobe CC is crucial in optimizing your creative endeavors. Let’s dive in and explore what Adobe Creative Cloud has to offer. Is Adobe Creative Cloud Worth It? Adobe Creative Cloud (Adobe CC) is a comprehensive suite of software applications and services developed by Adobe Inc. It encompasses a diverse range of tools tailored for creative professionals, including graphic designers, photographers, videographers, web developers, and more. the question remains: is it worth the investment? Let’s break down the key factors to consider. 1. Access to Latest Tools and Updates One of the primary benefits of Adobe CC is continuous access to the latest tools and updates. Subscribers receive regular updates and new features directly from Adobe, ensuring they stay current with technological advancements and industry standards. This can be particularly advantageous for professionals who rely on cutting-edge tools to maintain competitive edge and efficiency in their work. 2. Integration and Versatility Adobe CC’s seamless integration among its various applications is another compelling reason for its popularity. Whether you’re working on graphic design, video editing, web development, or photography, Adobe CC provides a cohesive ecosystem that allows for smooth transition and collaboration between different projects and disciplines. 3. Cloud Storage and Collaboration The inclusion of cloud storage and collaboration tools enhances workflow efficiency. With Adobe CC, users can store their projects and assets in the cloud, making them accessible from anywhere with an internet connection. This not only streamlines collaboration among team members but also provides a secure backup solution for important files. 4. Subscription Costs However, the subscription-based model of Adobe CC does come with costs. Subscribers pay a monthly or annual fee, depending on the plan they choose. While this ensures access to ongoing updates and support, it may present a financial consideration for individuals or businesses operating on tight budgets. 5. Learning Curve and Support For new users, Adobe CC’s extensive features may present a learning curve. Adobe provides resources such as tutorials, online courses, and a vibrant community to help users navigate and maximize the potential of its software suite. 6. Access to Mobile Apps Adobe CC extends its functionality beyond desktop applications with a suite of mobile apps optimized for creative tasks on the go. Whether capturing inspiration with Adobe Capture, editing photos with Adobe Lightroom Mobile, or designing layouts with Adobe Comp, these mobile apps provide flexibility and accessibility for creatives who need to work outside the confines of their desktop computers. Disadvantages and Considerations While Adobe Creative Cloud (Adobe CC) offers numerous advantages, it’s important to consider potential drawbacks and factors that may influence your decision to subscribe: 1. Subscription Costs One of the primary considerations with Adobe CC is its subscription-based pricing model. Subscribers pay either monthly or annually, depending on the plan chosen. This ongoing expense can accumulate over time, especially for individuals or businesses operating on strict budgets. It’s essential to weigh the cost against the value gained from continuous updates and access to premium features. 2. Internet Dependency Adobe CC operates on a cloud-based infrastructure, meaning users must have a stable internet connection to download and update software, access files stored in the cloud, and utilize certain features like cloud-based libraries and collaboration tools. This dependency on internet connectivity may pose challenges for users in remote locations or areas with unreliable internet service. 3. Learning Curve The breadth and depth of Adobe CC’s features can present a steep learning curve, particularly for beginners or those transitioning from other software platforms. Mastering tools like Photoshop, Illustrator, or Premiere Pro may require dedicated time and effort to unlock their full potential. Adobe provides extensive learning resources, but the initial learning phase should be considered when evaluating the investment in Adobe CC. 4. Overkill for Casual Users For casual users who require basic editing or occasional creative tasks, the comprehensive features of Adobe CC may be more than necessary. In such cases, simpler or more affordable alternatives could provide sufficient functionality without the complexity or cost associated with Adobe CC. Alternatives to Adobe Creative Cloud While Adobe Creative Cloud (Adobe CC) is a leading choice for many creatives, several alternative software solutions offer competitive features and pricing structures. Exploring these alternatives can help you find a toolset that better suits your specific needs and preferences: 1. Affinity Designer and Affinity Photo Affinity Designer and Affinity Photo by Serif provide robust alternatives to Adobe Illustrator and Photoshop, respectively. These applications offer a one-time purchase model without subscription fees, making them cost-effective options for users who prefer a perpetual license. 2. CorelDRAW Graphics Suite CorelDRAW Graphics Suite is another comprehensive software package tailored for graphic design and vector illustration. It offers a perpetual license model and includes features comparable to Adobe Illustrator and InDesign. 3. Sketch Sketch is widely favored among UI/UX designers for its intuitive interface and focus on web and mobile design. It provides powerful vector editing capabilities and collaborative features, catering specifically to digital design needs. 4. GIMP (GNU Image Manipulation Program) GIMP is a free and open-source alternative to Adobe Photoshop, offering a wide range of editing tools and customization options. While it may not have the same level of polish as Photoshop, GIMP is

Buying Guides, Internet

2024’s Best WiFi Extenders for Xfinity – Top Picks & Reviews

Do you want to deal with dead zones and weak WiFi signals in your home? With the right WiFi extender, you can boost your Xfinity network, ensuring strong and reliable internet throughout your space. Whether you’re streaming movies, playing online games, or just browsing the web, a good WiFi extender can make all the difference. In this article, we’ve reviewed the best WiFi extenders for Xfinity to help you find the perfect internet gadget for your needs. 7 Best WiFi Extenders for Xfinity We’ve got you covered whether you’re looking to eliminate dead zones or boost your network’s performance. Let’s take a look at the list of 7 best WiFi extenders for Xfinity. . 1. Xfinity xFi WiFi Range Extending Pods Xfinity xFi WiFi Range Extending Pods Check Price The Xfinity xFi WiFi Range Extending Pods are designed specifically for Xfinity rented routers, making them a seamless choice for Xfinity customers. These pods offer easy plug-and-play installation, automatically integrating with your existing Xfinity network. They help eliminate dead spots in your home by extending WiFi coverage to hard-to-reach areas. Each pod is capable of covering up to 1,500 square feet, ensuring strong and reliable connectivity throughout your space. Pros Easy integration with Xfinity routers Simple plug-and-play setup Effective coverage for up to 1,500 sq.ft. Automatic updates and network optimization Cons Higher cost compared to generic extenders Only compatible with Xfinity rented routers 2. TP-Link WiFi Extender with Ethernet Port (RE220) TP-Link WiFi Extender with Ethernet Port (RE220) Check Price The TP-Link RE220 is a versatile WiFi extender that provides dual-band connectivity, enhancing your Xfinity network with up to 1200 Mbps speed. It supports OneMesh, allowing seamless roaming across your home. With an Ethernet port, you can connect wired devices for faster speeds. The compact design and easy setup via the TP-Link Tether app make it a user-friendly choice for extending your WiFi coverage up to 1200 sq.ft. and supporting up to 30 devices. Pros Dual-band speeds up to 1200 Mbps Supports OneMesh for seamless roaming Ethernet port for wired connections Easy setup with TP-Link Tether app Cons Limited range compared to some other models. May require occasional resets for optimal performance. 3. WiFi Extender Signal Booster for Home WiFi Extender Signal Booster for Home Check Price This WiFi extender signal booster is designed to cover extensive areas up to 10,000 sq.ft. and support up to 35 devices. It offers a dual-band connection with speeds up to 1000 Mbps, making it ideal for large homes and heavy internet usage. The four antennas ensure a stable and strong signal, while the Ethernet port provides a wired connection option for enhanced performance. Pros Wide coverage area up to 10,000 sq.ft Supports up to 35 devices Dual-band speeds up to 1000 Mbps Four antennas for strong signal Cons Bulkier design Setup can be more complex than simpler models 4. NETGEAR WiFi Range Extender EX5000 NETGEAR WiFi Range Extender EX5000 Check Price The NETGEAR EX5000 is a reliable choice for extending your Xfinity network, offering coverage up to 1500 sq.ft. and supporting up to 25 devices. This AC1200 WiFi extender provides dual-band connectivity for a combined speed of up to 1200 Mbps. The compact design and simple setup process make it a convenient addition to any home network. Pros Dual-band AC1200 speeds Coverage up to 1500 sq.ft Supports up to 25 devices Compact and easy to install Cons Limited range for very large homes No Ethernet port for wired connections 5. WiFi Extender Signal Booster with 4 Antennas WiFi Extender Signal Booster with 4 Antennas Check Price Similar to its counterpart, this WiFi extender signal booster covers up to 10,000 sq.ft. and supports up to 35 devices. It offers dual-band speeds of up to 1000 Mbps and features four antennas for enhanced signal strength and stability. The Ethernet port allows for wired connections, making it versatile for different networking needs. pros Extensive coverage up to 10,000 sq.ft Supports up to 35 devices Dual-band speeds up to 1000 Mbps Four antennas for strong signal Cons Bulky design Setup may be challenging for some users 6. 2024 WiFi Extender Signal Booster for Home 2024 WiFi Extender Signal Booster for Home Check Price This 2024 model WiFi extender features six powerful antennas, providing coverage up to 10,000 sq.ft. and speeds up to 1200 Mbps on dual bands (5GHz/2.4GHz). It’s designed for long-range wireless internet boosting, making it perfect for large homes with multiple devices. The simple setup process and robust performance make it a top choice for enhancing your Xfinity network. Pros Six antennas for powerful signal Coverage up to 10,000 sq.ft Dual-band speeds up to 1200 Mbps Easy setup process Cons Larger and bulkier than some other models Higher price point 7. AX3000 WiFi 6 Extender Signal Booster AX3000 WiFi 6 Extender Signal Booster Check Price The AX3000 WiFi 6 Extender offers cutting-edge technology with dual-band speeds and coverage up to 12,001 sq.ft. It’s designed to handle high-speed connections and numerous devices simultaneously, making it ideal for modern smart homes. The inclusion of a gigabit port ensures that wired devices can also benefit from the extended network. Pros WiFi 6 technology for faster speeds Coverage up to 12,001 sq.ft Supports multiple devices Gigabit port for wired connections Cons More expensive than WiFi 5 models Setup might be complex for beginners Final Verdict: Our Top Pick wifi extender for Xfinity Xfinity xFi WiFi Range Extending Pods Check Price After reviewing all the options, our top pick is the Xfinity xFi WiFi Range Extending Pods. The product emerges as our top pick for enhancing your Xfinity network coverage. These pods seamlessly integrate with Xfinity rented routers, ensuring compatibility and easy setup. With their sleek design and reliable performance, they effectively eliminate dead zones and provide strong, reliable internet connectivity throughout your home. Why Choose Xfinity xFi WiFi Range Extending Pods? 1. Compatibility Specifically designed for use with Xfinity rented routers, ensuring seamless integration and hassle-free setup. 2. Coverage Provides extensive coverage to eliminate dead zones and ensure strong,

Software

Top 7 Best Editing Software for Beginners

In today’s digital age, editing software is essential for creating professional-looking videos, photos, and graphics. Whether you’re a budding YouTuber, an aspiring filmmaker, or someone looking to enhance your social media presence, choosing the right editing software can make all the difference. This article explores the top 7 best editing software for beginners, providing detailed insights into each option to help you make an informed decision. iMovie Visit Site OpenShot Visit Site Lightworks Visit Site Shotcut Visit Site Canva Visit Site Avidemux Visit Site Clipchamp Visit Site Top 7 Best Editing Software for Beginners 1. iMovie iMovie is a free video editing application developed by Apple for Mac, iPhone, and iPad users. It is designed to be accessible to users with little or no video editing experience, featuring a user-friendly interface, pre-set themes, and templates. Advanced tools like color correction and image stabilization are also available and integrate seamlessly with other Apple products. Despite being limited to Apple devices, iMovie is an excellent starting point for beginners due to its intuitive design and high-quality output. Pros Free to use Intuitive and easy to learn High-quality output Cons Limited to Apple devices Less advanced features compared to professional software 2. OpenShot OpenShot Video Editor is a free and open-source video editor available for Windows, macOS, Linux, and ChromeOS. Launched in 2008 by Jonathan Thomas, OpenShot aims to provide a stable, free, and user-friendly video editor. It offers cross-platform support, a drag-and-drop timeline, and unlimited tracks/layers. With a wide range of video effects and transitions, OpenShot is ideal for beginners looking for a comprehensive yet accessible editing tool. Pros Free and open-source Easy to use with a clean interface Regular updates and improvements Cons Occasional stability issues Limited advanced features 3. Lightworks Lightworks is a freemium non-linear editing system that has been in development since 1989. Known for its professional-grade video editing tools, Lightworks supports various formats and resolutions, including real-time effects and color correction. It also features multicam editing, making it suitable for more complex projects. While it has a steeper learning curve, Lightworks offers a free version with essential features and is used in Hollywood film production, providing high-quality, professional-level editing. Pros High-quality, professional-level editing Free version available with essential features Used in Hollywood film production Cons Steeper learning curve Some advanced features are only available in the paid version 4. Shotcut Shotcut is a free and open-source, cross-platform video, audio, and image editing program. Developed by Dan Dennedy in 2011, Shotcut is built on the MLT Multimedia Framework, ensuring robust performance and reliability. It supports a wide range of formats and offers advanced audio and video editing tools, along with a customizable interface. Although it has a slightly more complex interface, Shotcut provides powerful features for those looking to delve deeper into editing. Pros Free and open-source Regular updates and improvements Powerful features for advanced editing Cons Slightly more complex interface Limited built-in templates and effects 5. Canva Canva is a graphic design platform launched in 2013 that provides tools for creating social media graphics, presentations, promotional merchandise, and websites. Known for its drag-and-drop design interface, Canva offers an extensive library of templates and elements, collaboration features for team projects, and supports various design formats. Its user-friendly design tools make it a great choice for beginners, though some premium content requires a subscription. Pros Extremely user-friendly Versatile for different types of design projects Free version with plenty of features Cons Limited advanced editing features Some premium content requires a subscription 6. Avidemux Avidemux is a free and open-source software application designed for non-linear video editing and transcoding multimedia files. It is intended as a simple tool for basic video processing tasks, making it perfect for beginners. With cross-platform support, basic cutting, filtering, and encoding tasks, and a wide range of supported file types, Avidemux is lightweight and fast, though it has limited advanced features and a basic user interface. Pros Free and open-source Easy to use for basic editing tasks Lightweight and fast Cons Limited advanced features Basic user interface 7. Clipchamp Clipchamp is an online video editing tool developed by the Australian company Clipchamp Pty Ltd. Now owned by Microsoft, it allows users to import, edit, and export audiovisual material directly in a web browser. Featuring a drag-and-drop interface, an extensive library of templates and stock footage, and the ability to export in various resolutions and formats, Clipchamp is highly accessible, though it requires an internet connection and some features require a subscription. Pros No software installation required User-friendly interface Good selection of templates and stock footage Cons Internet connection required Some features require a subscription Free vs. Paid Editing Software When choosing editing software, it’s important to consider whether to opt for free or paid options. Free software like OpenShot and Shotcut can provide all the basic tools you need without any cost. However, paid options like Lightworks and premium features in Canva can offer advanced tools and better support, which might be worth the investment if you plan to do more complex editing. How to Choose the Best Editing Software for Beginners? Choosing the right editing software can significantly impact your editing experience and the quality of your final product. Here are key factors to consider when selecting the best editing software for beginners. 1. Ease of Use Look for software with an intuitive, user-friendly interface that makes it easy to navigate and learn. Tutorials, guides, and an active user community can also help you get started quickly. 2. Features Identify the essential tools and features you need for your projects. Basic features like cutting, trimming, and adding transitions are necessary, while advanced options like color correction, audio editing, and special effects can enhance your work as you become more experienced. 3. Support and Community Consider software that offers good customer support and has an active user community. Access to forums, online tutorials, and user guides can be invaluable for troubleshooting and learning new techniques. 4. Compatibility Ensure the software is compatible with your operating

Top 10 True Wireless Earbuds with Charging Case for 2024
Buying Guides, Gadgets

Top 10 True Wireless Earbuds with Charging Case for 2024

In the world of audio accessories, true wireless earbuds have become increasingly popular, offering convenience and mobility without compromising on sound quality. Here, we present the top 10 true wireless earbuds with charging cases for 2024, each offering unique features to enhance your listening experience. Product at Glance: True Wireless Earbuds with Microphone Check Price Echo Buds Check Price Galaxy Buds Live True Wireless Earbuds Check Price TAGRY  True Wireless Earbuds Check Price JLab Go Air Pop True Wireless  Earbuds Check Price TOZO T12 Wireless Earbuds Check Price Skullcandy Push Active In-Ear Wireless Earbuds Check Price Jabra Elite Active 75t True Wireless Earbuds Check Price SENTRY BLWBT991 Earbuds True Wireless Check Price Bluetooth Headphones Wireless Earbuds Check Price 1. True Wireless Earbuds with Microphone True Wireless Earbuds with Microphone Check Price The True Wireless Earbuds in White with Bluetooth 5.3 and a built-in microphone offer an immersive audio experience coupled with the convenience of wireless connectivity. These earbuds are designed for active lifestyles, featuring noise-canceling technology and deep bass for an enhanced listening experience. With Bluetooth 5.3 technology, you can enjoy seamless connectivity and reliable audio streaming from your device. The ergonomic design ensures a secure and comfortable fit, making them perfect for workouts or everyday use. Additionally, the included charging case provides extended battery life, ensuring you can enjoy your favorite music or podcasts throughout the day. Whether you’re commuting, working out, or simply relaxing at home, these True Wireless Earbuds deliver exceptional sound quality and convenience. Pros Bluetooth 5.3 ensures a stable connection Built-in microphone for hands-free calls Sleek and ergonomic design for comfort Long battery life for extended use Cons Limited color options May not fit all ear sizes perfectly Limited compatibility with some devices 2. Echo Buds Echo Buds Check Price The Echo Buds, released in 2023, represents the pinnacle of true wireless earbud technology, offering a host of features designed to elevate your audio experience. With built-in Alexa integration, you can enjoy hands-free voice control and access to a wide range of voice commands. The earbuds boast a 20-hour battery life, ensuring extended listening sessions without the need for frequent recharging. Additionally, they are sweat-resistant, making them perfect for workouts and outdoor activities. The fast-charging feature provides additional convenience, allowing you to quickly recharge the earbuds on the go. With premium sound quality and advanced features, the Echo Buds are a top choice for discerning audio enthusiasts. Pros Alexa integration for voice control Sweat-resistant design for workouts Customizable fit for all ear shapes Premium sound quality for immersive listening Cons Limited battery life compared to competitors May be bulky for some users 3. Galaxy Buds Live True Wireless Earbuds Galaxy Buds Live True Wireless Earbuds Check Price The Galaxy Buds Live True Wireless Earbuds offer a unique and ergonomic design, providing a comfortable fit for extended wear. With active noise-canceling technology, you can immerse yourself in your music without distractions from the outside world. The wireless charging case allows for convenient recharging on the go, while the compact size makes it easy to carry with you wherever you go. With compatibility with both Android and iOS devices, these earbuds are versatile and suitable for a wide range of users. Whether you’re commuting, working out, or simply relaxing at home, the Galaxy Buds Live deliver exceptional sound quality and comfort. Pros Active noise canceling for immersive sound Wireless charging case for convenience Ergonomic design for comfortable fit Touch controls for easy operation Cons May not fit securely in all ears Limited color options 4. TAGRY  True Wireless Earbuds TAGRY  True Wireless Earbuds Check Price The TAGRY Bluetooth Headphones True Wireless Earbuds offer exceptional sound quality and versatility in a compact and stylish design. With up to 60 hours of playback time and an LED power display on the charging case, you can enjoy uninterrupted music wherever you go. These earbuds feature wireless charging capabilities and IPX5 waterproofing, making them perfect for workouts and outdoor activities. The built-in microphone allows for hands-free calls, while the ergonomic design ensures a comfortable fit for extended wear. With advanced features and long-lasting battery life, the TAGRY True Wireless Earbuds are an excellent choice for music enthusiasts on the go. Pros LED power display for battery status IPX5 waterproof rating for durability Enhanced bass for rich audio experience Lightweight and portable design Cons Limited compatibility with devices May have connectivity issues 5. JLab Go Air Pop True Wireless  Earbuds JLab Go Air Pop True Wireless  Earbuds Check Price The JLab Limited Edition Go Air Pop True Wireless Bluetooth Earbuds combine style, performance, and affordability in one sleek package. With a clear design and dual connect feature, these earbuds offer seamless connectivity and a secure fit. The IPX4 sweat resistance ensures durability during workouts, while the Bluetooth 5.1 connection provides a stable and reliable audio experience. With three EQ sound settings, you can customize your listening experience to suit your preferences. The compact charging case offers additional convenience, allowing you to recharge your earbuds on the go. Whether you’re working out or on the move, the JLab Limited Edition Go Air Pop Earbuds deliver impressive sound quality and comfort. Pros Dual connect feature for seamless connectivity Three EQ sound settings for personalized audio Compact and lightweight design Sweat-resistant for active lifestyles Cons Limited color options May lack advanced features compared to competitors 6. TOZO T12 Wireless Earbuds TOZO T12 Wireless Earbuds Check Price The TOZO T12 Wireless Earbuds Bluetooth 5.3 Headphones offer a premium audio experience with advanced features to enhance your listening pleasure. With Bluetooth 5.3 technology, these earbuds provide a stable and seamless connection, ensuring uninterrupted music playback. The Call ENC Noise Cancelling Mic filters out background noise for crystal-clear calls, while the 55-hour playtime ensures extended usage on a single charge. The IPX8 waterproof rating makes them suitable for outdoor activities and workouts. With app-customizable EQ settings and LED digital display, the TOZO T12 earbuds offer unparalleled convenience and performance for music enthusiasts. Pros Call ENC Noise Cancelling

How to Delete X Account? 2024 Updated Guide
Social Media

How to Delete X Account? [Solved]

In today’s digital age, managing your online presence has become increasingly important. With numerous accounts on various social media platforms, it can sometimes feel overwhelming to keep track of all your information and interactions. One critical aspect of digital management is knowing when and how to delete an account that you no longer use or need. Whether it’s due to privacy concerns, reducing digital clutter, or simply transitioning to a different service, deleting an account can help you take control of your online life. In this guide, we will walk you through the steps to delete your X account. We’ll cover the reasons why you might want to delete your account, the preliminary steps to take before doing so, and a detailed step-by-step process for deletion. How to Delete X Account:? (Step-by-Step Guide) Deleting your X account is a straightforward process, but it’s essential to follow each step carefully to ensure that your data is removed securely and completely. Here’s a detailed step-by-step guide to help you through the process: 1. Log into your X account and navigate to the account settings, typically found in the upper right corner under a profile icon or dropdown menu. 2. Look for the option to delete your account. This might be under Privacy, Security, or Account Management. 3. Carefully read the information about what will be lost, the timeframe for deletion, and any consequences. 4. Confirm your choice to delete your account. This may involve re-entering your password, providing a reason for leaving or clicking a confirmation link sent to your email. 5. Click the Delete Account button. You might need to complete additional security checks, like two-factor authentication. 6. Confirm that your account has been deleted by attempting to log in again (you should be denied access), checking for an email confirmation, or visiting the platform’s support page. Following these steps will ensure that your X account is deleted securely and your personal information is no longer accessible on the platform. Alternatives to Deleting Your X Account Before you decide to delete your X account permanently, consider some alternative actions that might better suit your needs. Here are a few options to think about: 1. Deactivate Your Account Temporarily Most platforms offer a deactivation option that allows you to take a break without losing your data. This way, you can reactivate your account whenever you choose. 2. Adjust Privacy Settings Review and update your privacy settings to control who can see your information and posts. Tightening your privacy settings can make your account feel more secure and private. 3. Unfollow or Block Problematic Users If you’re facing harassment or unwanted interactions, unfollowing or blocking specific users can significantly improve your experience without needing to delete your account. 4. Reduce Notifications Overwhelmed by constant notifications? Adjust your notification settings to receive fewer alerts or only the most important ones, reducing stress without losing access to your account. 5. Limit Your Usage Set personal limits on how much time you spend on the platform. Use tools like app timers or digital well-being features to help manage your usage. 6. Clear Your Activity If you’re concerned about past activity, consider clearing your history, deleting old posts, or removing personal data. Many platforms allow you to bulk delete or archive old content. 7. Consult Support or Community Guidelines Reach out to the platform’s support team for assistance with specific issues. They might offer solutions or advice tailored to your concerns that don’t involve deleting your account. By considering these alternatives, you can address your issues with the platform without the drastic step of permanently deleting your X account. This approach allows you to retain the connections and content you’ve built while mitigating the problems you’ve encountered. Steps Before Deleting Your X Account Before you proceed with deleting your X account, it’s essential to take some preliminary steps to ensure a smooth transition and mitigate any potential issues. Follow these steps to prepare for deleting your account: 1. Review Account Settings Go through your account settings to understand what data and preferences are associated with your X account. This includes profile information, privacy settings, and connected accounts or services. 2. Back-Up Important Data If there is any data or content on your X account that you want to keep, make sure to back it up before deletion. This could include photos, videos, documents, messages, or any other information you may need in the future. 3. Update Linked Accounts If your X account is linked to other services or accounts (such as social media accounts, email addresses, or third-party apps), update or unlink them as necessary. This will prevent any disruptions or access issues after deleting your X account. 4. Cancel Subscriptions If you have any active subscriptions or recurring payments associated with your X account, make sure to cancel them before deletion. This will prevent any unwanted charges or renewal fees. 5. Notify Contacts If you use your X account for communication or networking purposes, consider notifying your contacts or connections about your decision to delete your account. Provide them with alternative ways to stay in touch if necessary. 6. Resolve Pending Issues If there are any pending issues, disputes, or unresolved matters related to your X account, try to address them before proceeding with deletion. This could include outstanding payments, disputes with other users, or reported violations of terms of service. 7. Read Terms of Deletion Take the time to read and understand the platform’s terms and conditions regarding account deletion. This will ensure that you are aware of any specific requirements or consequences associated with deleting your X account. 8. Verify Identity Some platforms may require you to verify your identity or provide additional information before allowing you to delete your account. Make sure you have the necessary documents or credentials ready if needed. By completing these preliminary steps, you can minimize the potential impact of deleting your X account and ensure that you are fully prepared for the process. Common Issues and Troubleshooting

How to Retrieve Deleted Voicemail? Both IOS and Andriod (Expert Tips)
Internet

How to Retrieve Deleted Voicemail? (Expert Tips)

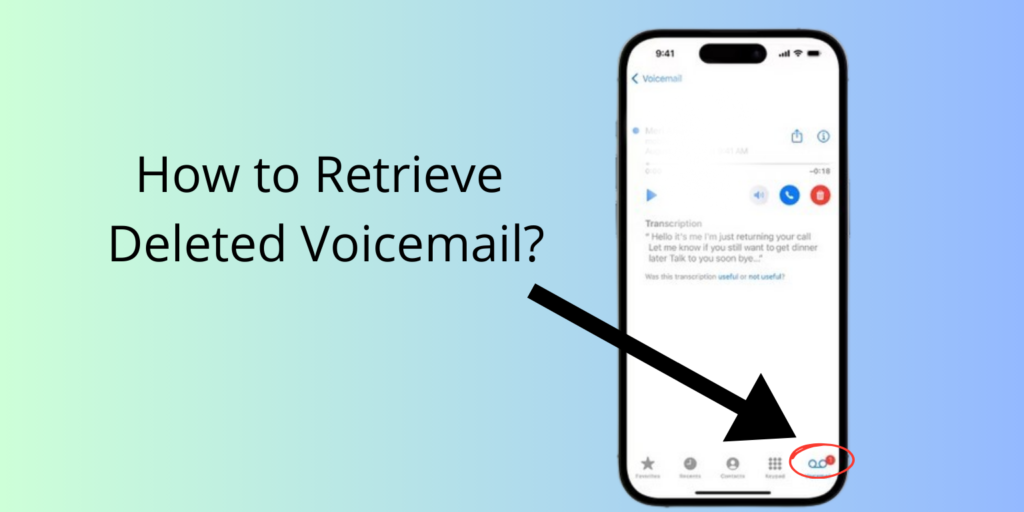
Voicemails are an integral part of modern communication, often containing important messages from loved ones, colleagues, and service providers. Whether it’s a heartfelt message from a family member, crucial work-related information, or a reminder from your doctor’s office, voicemails serve as a valuable repository of information. However, there are times when voicemails get deleted accidentally or due to system errors, leading to the potential loss of important information. The panic of losing a vital voicemail can be overwhelming, but the good news is that deleted voicemails can often be recovered. This internet guide aims to guide you through the various methods available to retrieve deleted voicemails, whether you’re using an iPhone, or Android device, or dealing with carrier-specific systems, by understanding the processes and tools at your disposal, you can increase your chances of recovering those precious messages. Retrieving Deleted Voicemails on iPhone (3 Ways) Losing an important voicemail on your iPhone can be distressing, but there are several ways to recover deleted messages. Apple’s iOS offers built-in features to help you retrieve deleted voicemails, and if those methods don’t work, contacting your carrier or using backups might be necessary. Here’s a step-by-step guide to help you through the process. 1. Using the Built-in “Deleted Messages” Folder I. Launch the Phone app on your iPhone and navigate to the Voicemail tab at the bottom right corner of the screen. II. Scroll down to the bottom of your voicemails list and tap on the Deleted Messages folder. III. Find the voicemail you want to recover, tap on it, and then tap the Undelete option. The voicemail will be moved back to your main voicemail inbox. 2. Contacting Your Carrier If the voicemail you need is not in the Deleted Messages folder, your next step is to contact your carrier. Carriers often retain deleted voicemails on their servers for a limited period and may be able to help you recover them. I. Contact your carrier’s customer service number. II. Explain the situation and provide details such as your phone number, and the time and date of the deleted voicemail. 3. Using iTunes or iCloud Backups If your carrier cannot recover the voicemail, you can try restoring your iPhone from a previous backup. This method will revert your phone to a state before the voicemail was deleted, potentially recovering it. I. Ensure that you have a recent iTunes or iCloud backup from before the voicemail was deleted. II. Go to Settings > General > Reset, then tap Erase All Content and Settings. III. Follow the setup steps until you reach the Apps & Data screen. IV. Tap Restore from iCloud Backup and sign in with your Apple ID. V. Choose a backup that predates the deletion of the voicemail and wait for the restore process to complete. Now follow these steps to restore from iTunes backup. I. Connect your iPhone to your computer and open iTunes. II. Select your device in iTunes. III. Click “Restore Backup” in the Summary section. IV. Choose a backup that predates the voicemail deletion and click Restore. Important Precautions 1. Backup Your Current Data: Before restoring from a backup, ensure that you back up your current data to avoid losing any recent information. 2. Consider Data Overwrite: Be aware that restoring from a backup will overwrite any data added after the backup date. Make sure to save or back up any important files created after the backup. By following these steps, you can maximize your chances of recovering deleted voicemails on your iPhone. Whether using the built-in “Deleted Messages” folder, contacting your carrier, or restoring from a backup, these methods provide comprehensive solutions to help retrieve your lost messages. Retrieving Deleted Voicemails on Android (2 Ways) Accidentally deleting a voicemail on an Android device can be a frustrating experience, but there are several methods to help you recover your lost messages. Whether you’re using built-in features on your Android phone, contacting your carrier, or utilizing third-party apps, you have multiple options to try. Here’s a comprehensive guide to help you retrieve deleted voicemails on Android devices. 1. Using the Voicemail App I. Open the Voicemail App. II. Look for a “Deleted” or “Trash” folder within the app. This folder contains recently deleted voicemails. III. Tap on the voicemail you want to restore and look for an option like “Undelete” or “Restore“. Select this option to move the voicemail back to your inbox. 2. Checking Cloud Backups If you have a cloud backup service enabled, you might be able to retrieve deleted voicemails from there. I. Open Your Cloud Service App, This could be Google Drive, OneDrive, or any other backup service you use. II.  Look for any backups that might contain your voicemails. Voicemails are often included in full device backups. III. Restore from Backup: Follow the instructions provided by the cloud service to restore the backup that includes your deleted voicemails. Important Precautions I. Regular Backups: Regularly back up your voicemails to prevent future loss. Many voicemail apps allow you to save voicemails directly to cloud storage or your device. II. Act Quickly: The sooner you attempt to recover a deleted voicemail, the higher the chances of successful recovery, especially with carrier assistance and data recovery apps. By following these steps, you can maximize your chances of recovering deleted voicemails on your Android device. Whether using built-in voicemail app features, you have multiple methods to retrieve your important messages. Third-Party Apps and Services If traditional methods and carrier-specific techniques don’t help you recover your deleted voicemails, third-party apps and services can offer an additional avenue for recovery. Here’s a simplified look at how you can use these apps to retrieve your important messages. 1. Dr.Fone – Data Recovery (Android) I. Install Dr.Fone from the Google Play Store. II. Open the app and grant permissions. III. Choose “Data Recovery” from the menu. IV. Let the app scan your device. V. Select and recover your deleted voicemails. 2. EaseUS MobiSaver (Android) I. Download EaseUS MobiSaver from the Google

Best Earbuds With Ear Hooks Reviewed (9 Top Picks)
Buying Guides, Gadgets

Best Earbuds With Ear Hooks Reviewed (9 Top Picks)

Earbuds have become a must-have in the world of portable audio. But if you’re an active person, you’ll need earbuds that don’t just provide great sound but also stay in place during intense workouts. That’s why we’ve put together a list of the best earbuds that come with ear hooks. They’re designed to keep your earbuds in place while you work out, so you don’t have to worry about them popping out of place. 9 Best Earbuds with Ear Hooks Whether you’re looking for a comfortable fit or just want an uninterrupted sound, we’ve got you covered. Check out our 9 best earbuds with hooks for the best combination of comfort, durability, and outstanding audio performance. Product at Glance: JBL Endurance Peak 3 Earbuds Check Price Jzones Open Earbuds Check Price Occiam Wireless Earbuds Check Price Beats Powerbeats Pro Earbuds Check Price Skullcandy Push Active In-Ear Earbuds Check price JVC New Nearphones Open Ear Check Price Soundcore Sport X10 True Bluetooth Earbuds Check Price Earbuds 75hrs Bluetooth Sport Check Price TAGRY Open Ear Bluetooth Earbuds Check Price 1. JBL Endurance Peak 3 Earbuds JBL Endurance Peak 3 Earbuds Check Price First on our list are the JBL Endurance Peak 3 – true wireless active earbuds. These buds come with an impressive list of features, including IP68, which means they’re water and dust-resistant. They’ll keep you motivated during your workout with JBL’s signature Pure Bass Sound. You’ll also get up to 50 hours of playtime with a speed charge, so you’ll be able to listen to your favorite tunes without interruption. Pros IP68 rating for durability JBL Pure Bass Sound Up to 50 total hours of playback Ambient aware & talk thru features Cons Higher price Limited color options 2. Jzones Open Earbuds Jzones Open Earbuds Check Price Up next, we have the Jzones open-ear headphones wireless Bluetooth 5.3 earbuds that stand out from the crowd. The open-ear design allows you to be aware of your environment while listening to your music. The Jzones open-ear headphones feature dual 16.2 mm dynamic drivers that deliver powerful sound with high-fidelity highs and deep-fidelity lows. The battery life of these headphones is up to 60 hours which gives you long-lasting performance even during the most intense workout sessions. The waterproof construction of these Jzones earbuds allows them to withstand sweat and rain making them ideal for outdoor activities. Pros Open-ear design Dual dynamic drivers 60 hours of playtime Waterproof Cons Less noise isolation Fixed ear hooks 3. Occiam Wireless Earbuds Occiam Wireless Earbuds Check Price Now, let’s move on to the Occiam wireless earbuds Bluetooth headphones. These wireless earbuds have a playback time of 96 hours, which means you’ll never run out of battery while you’re working out. The over-ear earbuds with ear hooks provide a comfortable and secure fit, so you can concentrate on what you’re doing without having to keep adjusting the earbuds all the time. With deep bass and crisp sound quality, you’ll get an engaging listening experience that will keep you motivated during your workout. Pros Up to 96 hours of playback Deep bass with ear hooks Built-in microphone Comfortable fit Cons Bulkier design Limited colors 4. Beats Powerbeats Pro Earbuds Beats Powerbeats Pro Earbuds Check Price Powered by Apple H1 headphones chip and class 1 Bluetooth, these wireless earbuds provide seamless connectivity and amazing sound quality. They’re designed to last through your most intense workout sessions, with up to a 9-hour listening time and a sweat-repellent construction. With a built-in mic, you’ll be able to call without having to put your hands in front of your ears. Ergonomic ear hooks ensure a comfortable fit all day long. Pros Apple H1 chip Sweat-resistant Secure ear hooks 9 hours of listening time Cons Higher price Limited colors 5. Skullcandy Push Active In-Ear Earbuds Skullcandy Push Active In-Ear Earbuds Check Price Next up are Skullcandy’s push active in-ear wireless earbuds. With a battery life of 43 hours, you’ll be able to listen to your favorite tunes all day long. Skullcandy push-in-ear wireless earbuds have an intuitive touch control and are compatible with Alexa, making them hands-free. They’re also sweat-resistant and have a secure fit, making them perfect for workouts or outdoor activities. Pros Up to 43 hours of battery Alexa-enabled Sweat-resistant Compatible with various devices Cons Less secure fit Complex touch controls 6. JVC New Nearphones Open Ear JVC New Nearphones Open Ear Check Price Looking for the next generation of headphones? Look no further than JVC’s New Nearphones open-ear true wireless Headphones. Featuring powerful 16mm drivers and a compact design, these earbuds are perfect for taking with you wherever you go. With up to 38 hours of battery life, you’ll be able to listen to music all day long. Plus, with the single-ear use feature, you can stay connected to your environment while enjoying your music. Perfect for outdoor activities and exercise. Pros Powerful sound Compact size Long battery life. Lightweight Cons Limited customization Less secure fit 7. Soundcore Sport X10 True Bluetooth Earbuds Soundcore Sport X10 True Bluetooth Earbuds Check Price As we continue down the list, let’s take a look at the Soundcore Sport x10 True Wireless Bluetooth earbuds. Featuring rotatable hooks, these earbuds provide a comfortable and secure fit during your workouts. Featuring deep bass and a waterproof rating of IPX7, these sports earbuds offer superior sound quality and performance, even in tough conditions. Fast charging capabilities allow you to quickly return to your workout without having to wait for the earbuds to be charged. Pros Rotatable hooks Deep bass IPX7 waterproof Fast charging Cons Bulky design Limited colors 8. Earbuds 75hrs Bluetooth Sport Earbuds 75hrs Bluetooth Sport Check Price Next up we have the wireless earbud 75hrs Bluetooth 5.3 headphone sport. These wireless earbuds are equipped with advanced features such as bp5.3 connectivity, noise-canceling microphones for crisp calls, and a secure fit. They are also IPX7 water-resistant, making them ideal for active people looking for a durable earbud that will last them a long time. Stereo

Scroll to Top